
My mother used to drink buttermilk by the glass. While I wouldn't go that far, I do love this pie. It's rich and tangy and creamy and refreshing all at the same time! While it is a classic, desperation pie that you can make on a cold winter day, it is equally welcome on a hot summer evening, topped with fresh berries.

Preheat the oven to 350°F.
Combine the sugar and butter in the bowl of a stand mixer fitted with the paddle attachment.
Zest the lemon over the ingredients in the bowl, and set the lemon aside to juice later. Cream together the butter, sugar and lemon zest on Medium until light and fluffy, 2 to 3 minutes.
In a small bowl, whisk together the egg yolks and add to the mixer. Mix on Low until combined.
In another small bowl, whisk together the flour, nutmeg and salt and add to the mixer. Mix on Medium until ingredients are thoroughly combined.
With the mixer on Low, slowly pour in the lemon juice, followed by the buttermilk. Scrape down the side and bottom of the bowl with a spatula.
In a separate bowl, whip the egg whites into soft peaks. Fold 1/3 of the whipped egg whites into the batter. Once combined, fold the remaining egg whites into the batter.
Gently pour the batter into the pie shell. Bake for 35 to 45 minutes, rotating 180 degrees after 20 minutes. The pie is done when a dark golden brown crust forms on top and the filling is set.
Cool for at least 2 hours before serving.
Mixing Steps
Cut the butter into 1/2-inch cubes. Freeze 5 tablespoons for 20 minutes or overnight; chill the remaining 11/8 sticks in the refrigerator until ready to use.
Stir the red wine vinegar into the cold water and set aside.
Combine the flour, salt and sugar in the bowl of a food processor and pulse 5 or 6 times to combine.
Add the chilled butter and mix for 25 to 30 seconds, until the mixture resembles coarse meal.
Add the frozen butter and pulse 15 to 20 times, until the butter is in pea-sized pieces.
Add 6 tablespoons of the vinegar water and pulse 6 times. The dough should start to look crumbly. Test the dough by squeezing a small amount in the palm of your hand. If it easily holds together, it is done. If not, add 1/2 tablespoon of the vinegar water and pulse 3 more times. Repeat this process as needed until the dough holds together.
Transfer the dough to a lightly floured work surface and knead together until smooth; dough should never come together in the food processor.
Divide the dough into 2 equal parts and roll each into a ball. Flatten the balls slightly and wrap separately in plastic wrap. Let the dough rest in the refrigerator until ready to use, at least 20 minutes but preferably overnight.
Rolling Steps
Liberally dust your rolling surface with flour and keep a container of flour nearby.
Place a ball of dough on the rolling surface and flatten it halfway with the heel of your hand.
Rub a handful of flour over your rolling pin and pound the dough until it is half as thick as when you started. Don't be timid; it takes more aggression than you think! Pounding the dough flattens it without working the gluten very much and softens it up for the finish rolling you are about to do.
Rub more flour over the rolling pin and, working out from the center; make long passes over the dough. Rotate the dough 1 to 2 inches after each pass to make sure it isn't sticking to the table and to help form an even circle. If the dough starts to stick, lift up one corner and scatter more flour underneath. Rub flour on the rolling pin as needed to keep it from sticking to the dough.
Keep rolling until the dough is 1/16 to 1/8 inch thick and is a sufficient size to cut out a circle with a 14-inch diameter.
Cut a 14-inch circle out of the dough. At the pie shop, we use a series of commercial pizza pans as guides. At home, a pot lid, plate or bowl works just as well. Place your guide in the middle of the dough and gently cut around it with a bench scraper or paring knife. (Just be careful not to press so hard that you cut your countertops!)
Lightly coat a 9-inch pie tin with cooking spray and dust with flour. Rotate the tin to coat the side. Turn the tin over and tap out any excess flour.
Pick the dough circle up firmly by the edges and center onto the prepared pie tin. Tap the pie tin on the counter several times until the dough settles into it. Gently press the dough into the corners of the pie tin with your fingertips.
Crimp the edge of the pie shell. Refrigerate or freeze until ready to bake. It can be stored in the refrigerator for up to 3 days or frozen for up to 1 week.
Blind Baking Steps
Blind baking is a funny-sounding term that simply means baking a pie shell prior to filling it. Though it has been a part of kitchen-speak for centuries, no one has any idea where the term came from. Lately, "pre-baking" has taken its place in contemporary recipes, and while it is certainly more descriptive, at Hoosier Mama we prefer the traditional term. Use "blind baking" confidently in a sentence and you get automatic membership in the secret society of pie makers!
Blind baking is used for this Buttermilk Pie and others, where the filling is not cooked in the pie shell, and for quiches and some custards, where the shell needs to bake longer than the filling. We also blind bake the shells for pies like Pumpkin or Hoosier Sugar Cream, where the pie filling bakes for up to an hour in the pie shell. We find it keeps the bottom crust from getting soggy.
In blind baking, pie shells are lined with parchment paper and filled with weights to keep air pockets from forming as the shells bake. You can buy ceramic weights or stainless steel "pie chains" at specialty cooking stores, but dried pinto beans are inexpensive and work just as well. At the shop, we line the shells with 13x5-inch coffee filters instead of parchment paper; they fit the 9-inch crimps perfectly and let air flow through to the bottom crust. Don't use foil or wax paper; foil blocks airflow, resulting in a tough, dense bottom crust and the coating on wax paper will burn and smoke in a hot oven.
Preheat the oven to 400°F.
 Place a frozen, crimped pie shell on a baking sheet. Line the inside of the shell with parchment paper or a coffee filter. Fill with uncooked beans until the beans are even with the top edge of the crimp. Press down on the beans to make sure they spread to the edges of the shell.
Bake for 20 minutes, rotating 180 degrees halfway through. The outer edge of the crimp should be dry and golden brown.
Remove the shell from the oven and carefully remove the parchment paper/coffee filter full of beans. If the paper sticks to the pie, bake it for 3 more minutes and try again. Once the parchment paper or coffee filter is removed, prick the bottom of the shell all over with a fork. Bake for 3 more minutes, until the interior of the shell is dry and light golden brown.
***
Paula Haney wrote The Hoosier Mama Book of Pie with Allison Scott. Paula founded Hoosier Mama Pie Company in 2009. An Indiana native, she was formerly the head pastry chef at Pili.Pili, One Sixtyblue and Trio, where she worked with head chef Grant Achatz. Haney and her family live in Chicago, IL. Allison Scott works at Hoosier Mama Pie Company and develops its savory pies. She lives in Chicago, IL.
Authors: Paula Haney with Allison Scott
Publisher: Agate Publishing Inc.
Penned: Aug. 15, 2013
What's Inside: More than 120 delectable pie recipes from Chicago's popular Hoosier Mama Pie Company. You'll find recipes for both sweet and savory pies. The sweet pies include everything from simple chess pies like Bourbon Pecan, great for beginning pie makers, to over-the-top creations such as  Peanut Butter Pie with Chocolate Ganache, sure to impress company. The savory pies consist of seasonal main dishes (think Frito-Chili Pie for fall), quiches (yummy Ham and Brie) and turnovers stuffed with satisfying fillings like Corn and Chorizo.
This helpful guide steps you through everything you need to know to bake the perfect pie, including creating a flaky, golden crust; making the silkiest cream filling, and working with temperamental ingredients like honey (who knew a few seconds in the microwave could make such a difference?).
Time Out: 360 pages
Available: $29.95 paperback at Amazon and other retailers
In the mood for something sweet? You'll also enjoy these favorites:

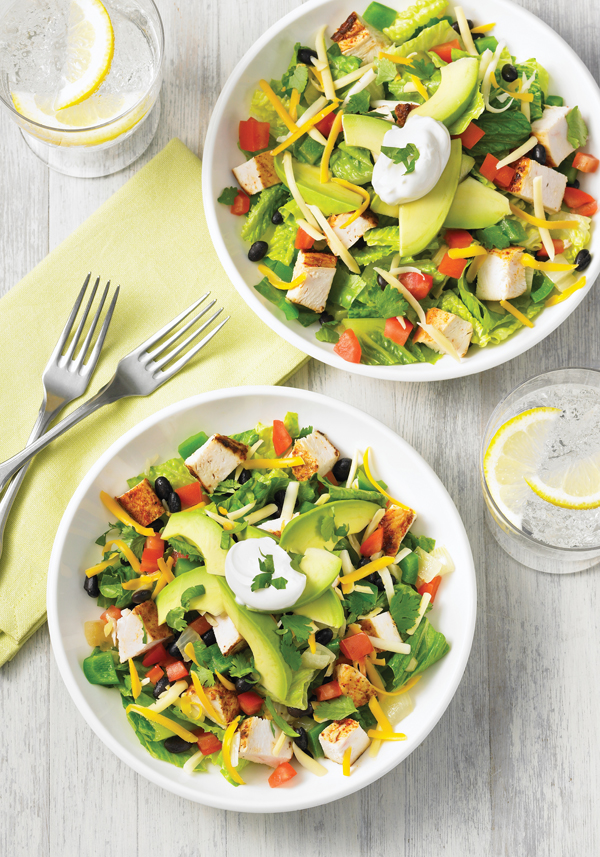
Prepare your own Mexican quick fix with this Chipotle-inspired bowl. Carbs are moderated by filling the bowl with beans, extra veggies and chicken. No need for rice, since the beans count as carbs.
Tips:
If you love tomatoes, increase the quantity to 1/2 cup, but note that the carbohydrates will also increase.
If preparing this recipe for one person, cut all of the ingredients in half. Or simply prepare the full recipe up to the end of step 2 and store leftover chicken and vegetable-bean mixture in separate airtight containers in the refrigerator for up to 2 days. Reheat in the microwave on High for 1 to 2 minutes, or until heated through, and continue with step 3.
Health Bite: The iron, calcium, magnesium, manganese, copper and zinc in black beans help to keep bones strong and healthy.
Follow us on Twitter: @BoomerBrief
and @CharlotteBoomer

Know someone battling cancer? Baylor Health Care System's Sammons Says... cancer blog is a great place to go for help. Here, you'll find information, resources, physicians, support groups and just about everything you need to help you navigate your way through this illness.
Senior Forums is a great place to get the news and share views on everything from hobbies and healthcare, to food, family & travel.
Matt Drudge gets the goods and his site ain't bad either.
You don't have to live in Dallas to enjoy D Magazine.
